Tuesday Tips & Techniques from Photo Pro Sascha Janson #27
On select Tuesdays, Cameras@Lembeh Resort – the first and only dedicated photo & video center in Lembeh Strait with full time on site photo pro – will feature Tips and Techniques by Photo Pro Sascha Janson. Sascha covers everyday situations he sees or has been asked about when talking with our visiting underwater photographers, so stay tuned, Sascha will offer up a range of information to help you become better prepared for underwater photography abroad and overcome some situations that may happen on dive holidays. You never know what piece of wisdom he will impart. Interested in a photo or video course, maybe you need a flip mount holder made on our 3D printer for your new diopter (maybe you just want to see a 3D printer)? Stop into cameras@Lembeh Resort and Sascha can set up time to assist you in capturing the best images possible.
Sascha says: Want to try something different? Use a ‘SNOOT’ !
Here in Lembeh we often run into problems trying to make the subjects ‘pop’, because they are sitting in the mucky sand and often we cannot shoot upwards. Of course it is an option to use programs like Lightroom, Photoshop etc., but there’s also the option of using a snoot.
What is a snoot? A snoot reduces the beam angle of a light source so that we don’t light up the entire surroundings, but rather only a specific area. Snoots can be very simple, from using a piece of old wetsuit sleeve or plastic pipe in front of a strobe to more complex fiber optic snoots and ‘Light Shaping Devices’.
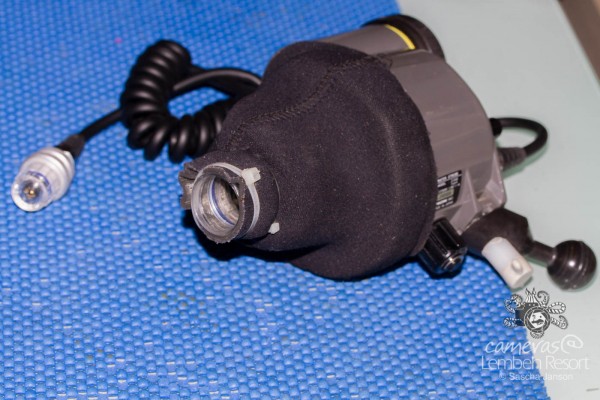
This is a very inexpensive way to make a DIY snoot out of an old wetsuit sleeve. To get an even smaller beam, I used a plastic bottle neck and a couple of cable ties.
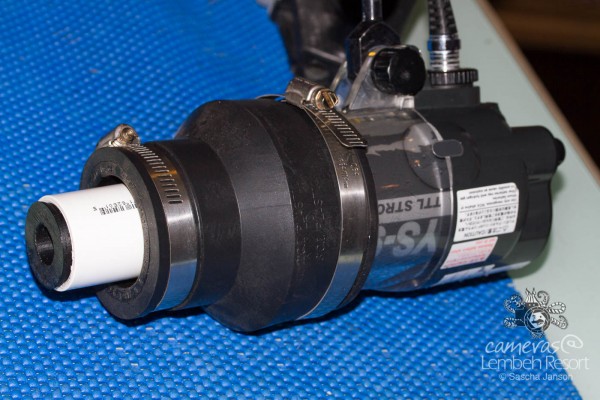
Another example of a homemade snoot – look in a hardware store for these tools.
You can also create a snoot effect with LED lights, I often use the spot function of a video light to make the subject stand out from the background.
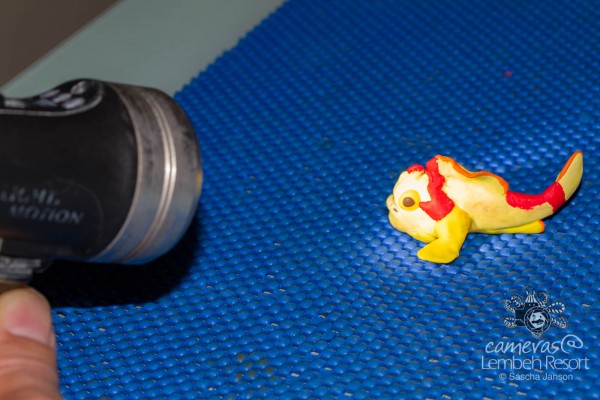
A frogfish model lit up with the spot function of a LED video light.
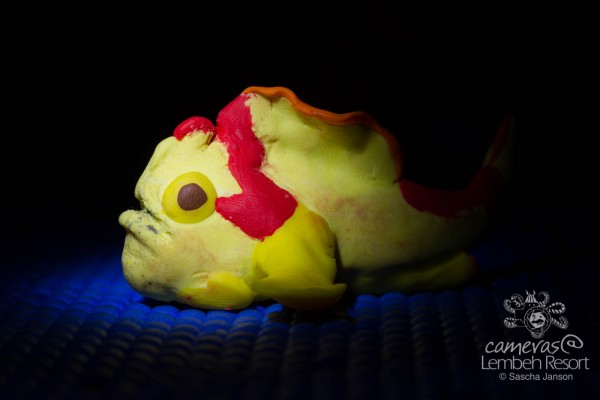
Frogfish model illuminated with the spot function of a LED video light – foreground and background don’t get lit up.
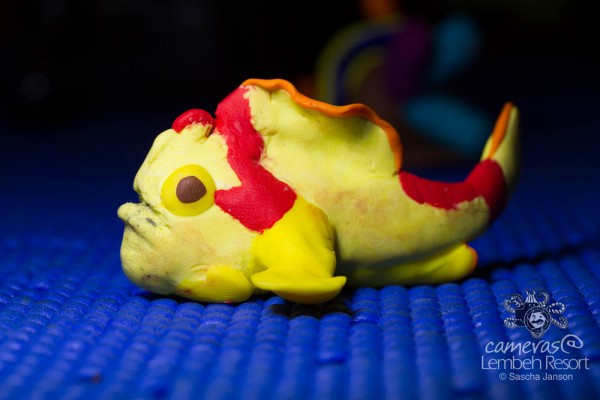
Frogfish model illuminated with the wide beam function of a LED video light – here the foreground and background get lit up as well.
For lighting up even smaller areas and being a bit more flexible, there are as well some fiber optic snoots and light shaping devices available.
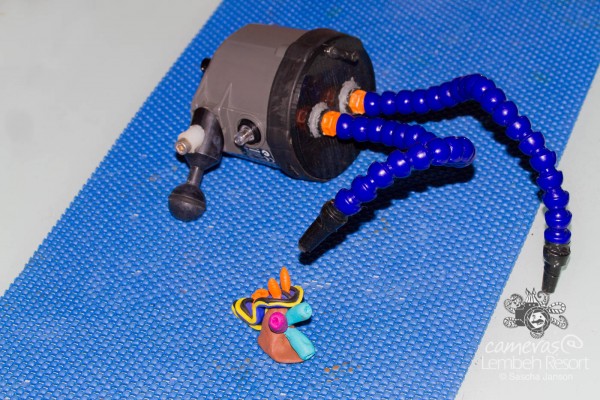
DIY fiber optic snoot and nudibranch model.
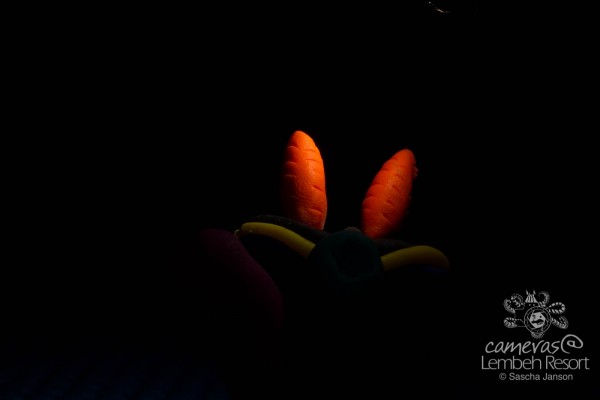
This is the shot I got with the above setup – only the rhinophores of the model nudibranch are lit up.
Here are two example shots, one using the DIY fiber optic snoot and another one using a video light:
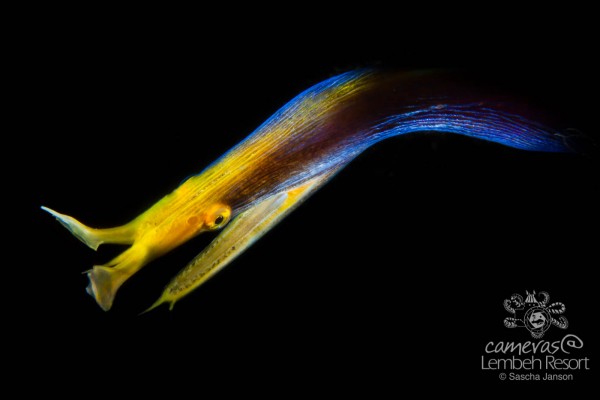
For this image of a blue ribbon eel (Rhinomuraena quaesita) I used the DIY fiber optic snoot. Canon 7D, 100mm macro, f22, 1/250sec, ISO160, DIY fiber optic snoot on INON Z240.
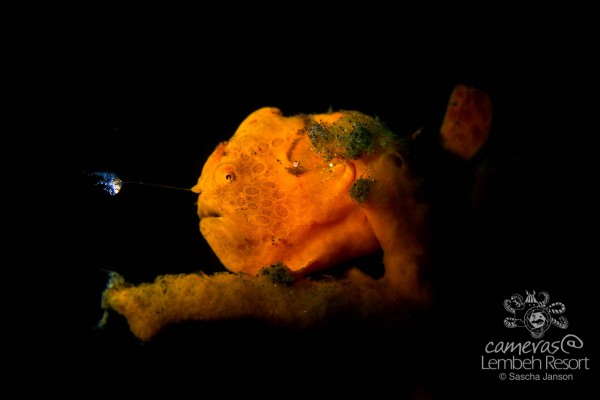
This image of a painted frogfish (Antennarius pictus) was taken using the spot function of a LED video light. Canon 7D, 60mm macro, f5.6, 1/320sec, ISO160, 1x SOLA 1200 video on spot.
Positioning the snoot while taking photos can be tricky, so if you have an obliging buddy, or a dive guide like the ones at critters@Lembeh Resort who are trained in underwater photography, you could ask him or her to help direct the beam of the snoot directly on to the part of the animal you want to illuminate and get more exact results (and hopefully less frustration)! Don’t forget to brief your buddy or guide in advance so they know what you would like them to do.
Stay tuned for more Tuesday Tips & Techniques


