Tuesday Tips & Techniques from Photo Pro Sascha Janson #28
On select Tuesdays, Cameras@Lembeh Resort – the first and only dedicated photo & video center in Lembeh Strait with full time on site photo pro – will feature Tips and Techniques by Photo Pro Sascha Janson. Sascha covers everyday situations he sees or has been asked about when talking with our visiting underwater photographers, so stay tuned, Sascha will offer up a range of information to help you become better prepared for underwater photography abroad and overcome some situations that may happen on dive holidays. You never know what piece of wisdom he will impart. Interested in a photo or video course, maybe you need a flip mount holder made on our 3D printer for your new diopter (maybe you just want to see a 3D printer)? Stop into cameras@Lembeh Resort and Sascha can set up time to assist you in capturing the best images possible.
Sascha says: Here’s how I use the ‘SNOOT’ !
In the last TT&T #27 I talked about snoots – Using snoots is a lot of fun and you can get very cool-looking images, but they can also be very difficult to operate. Here are some tips that will help to minimize frustration when using these tools.
Using a wetsuit sleeve over the strobe is cheap, fun and easy to use. The effect is very nice, just point the strobe in the direction of the subject and you don’t light up the whole scene.
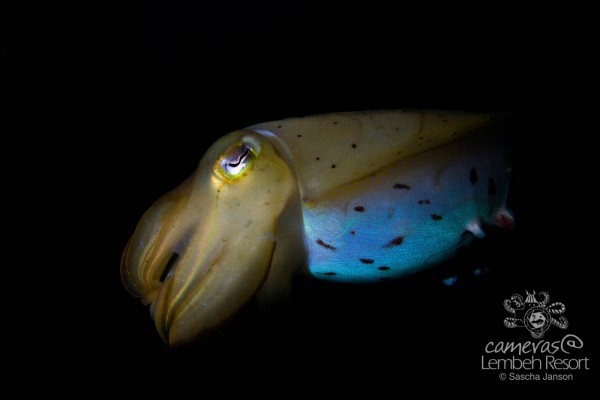
Cuttlefish lit up with one strobe and wetsuit sleeve. Canon 7D, 60mm macro, f20, 1/250sec, ISO125, 1x INON Z240.
The very first time I used a fiber optic snoot I had it connected to my camera rig and got some nice results when practicing on land. I focused on a subject, locked the focus and positioned the snoot on the subject. When I entered the water I found a tunicate, looked through the viewfinder and got the shot pictured below.
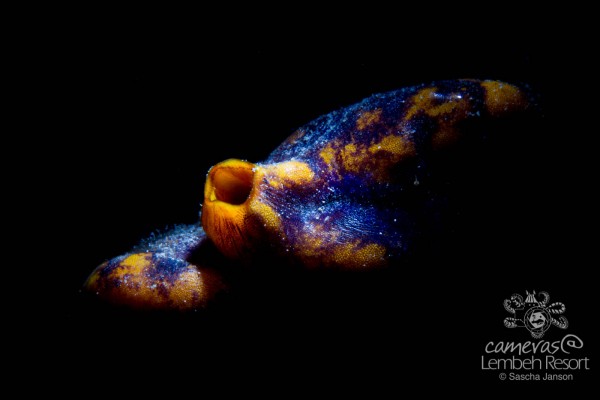
Tunicate in Misool, Raja Ampat. Image taken with Canon 7D, 100mm macro, f18, 1/250sec, ISO100, 1x INON Z240 with DIY fiber optic snoot connected to the camera. My very first fiber optic snoot shot!
After I took this shot, I accidently touched the snoot and it moved a bit. The next hundred images or so were just black or only one corner of the image was lit up and I had a really hard time trying to figure out how to position the snoot. At one point I gave up. Later I did the same thing a few more times and it was very frustrating, because after a while the snoot always moved a bit.
After a few more attempts, I decided to take the strobe off my rig and gave it to my dive buddy and that worked way better. But still it was very awkward to have that cable connected to the strobe and camera and sometimes it was in the way. I then disconnected the sync cable (on land!) and removed the plastic cap from the light sensor on my INON Z240 strobe to be able to trigger the strobe with another strobe. That worked way better: I just had one strobe on my rig (connected with a sync cable) which I set to minimal power output and the strobe with the snoot I had on maximum power and was able to trigger it with the strobe connected to the camera. No cable was in the way and I was able to position myself wherever I wanted without having to worry about the cable. Just make sure that the optical sensor on the snoot strobe is facing the camera, otherwise it will not fire. For shooting with snoot, the TTL function generally doesn’t work well, so don’t waste your time doing that, you have to use your strobe(s) in manual mode.
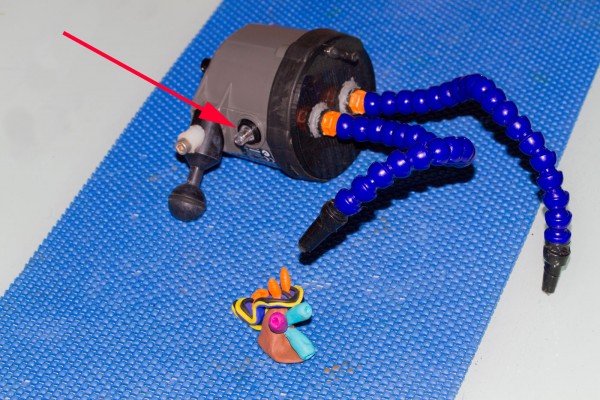
Make sure that the optical sensor (red arrow) is facing the strobe attached to the camera.
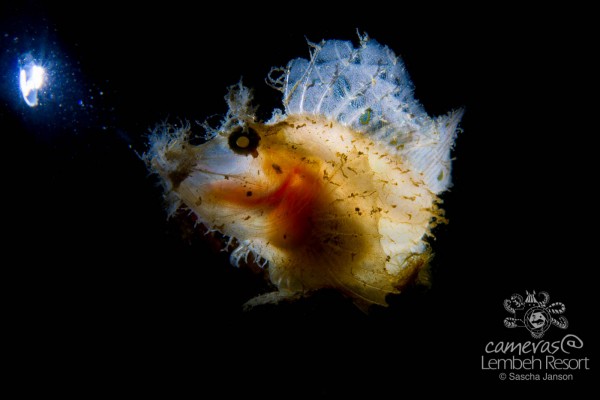
Rhinopias lit up from behind with a DIY fiber optic snoot. Canon 7D, 60mm macro, f20, 1/160sec, ISO100, 2x INON Z240 (one on minimal power connected to camera, one on maximum power with the fiber optic snoot). Without having the cable connected I could position the snoot strobe behind the rhinopias, and was able to take a few shots of it like this.
Nudibranchs are great subjects to practice with snoots, because they usually don’t move that fast.
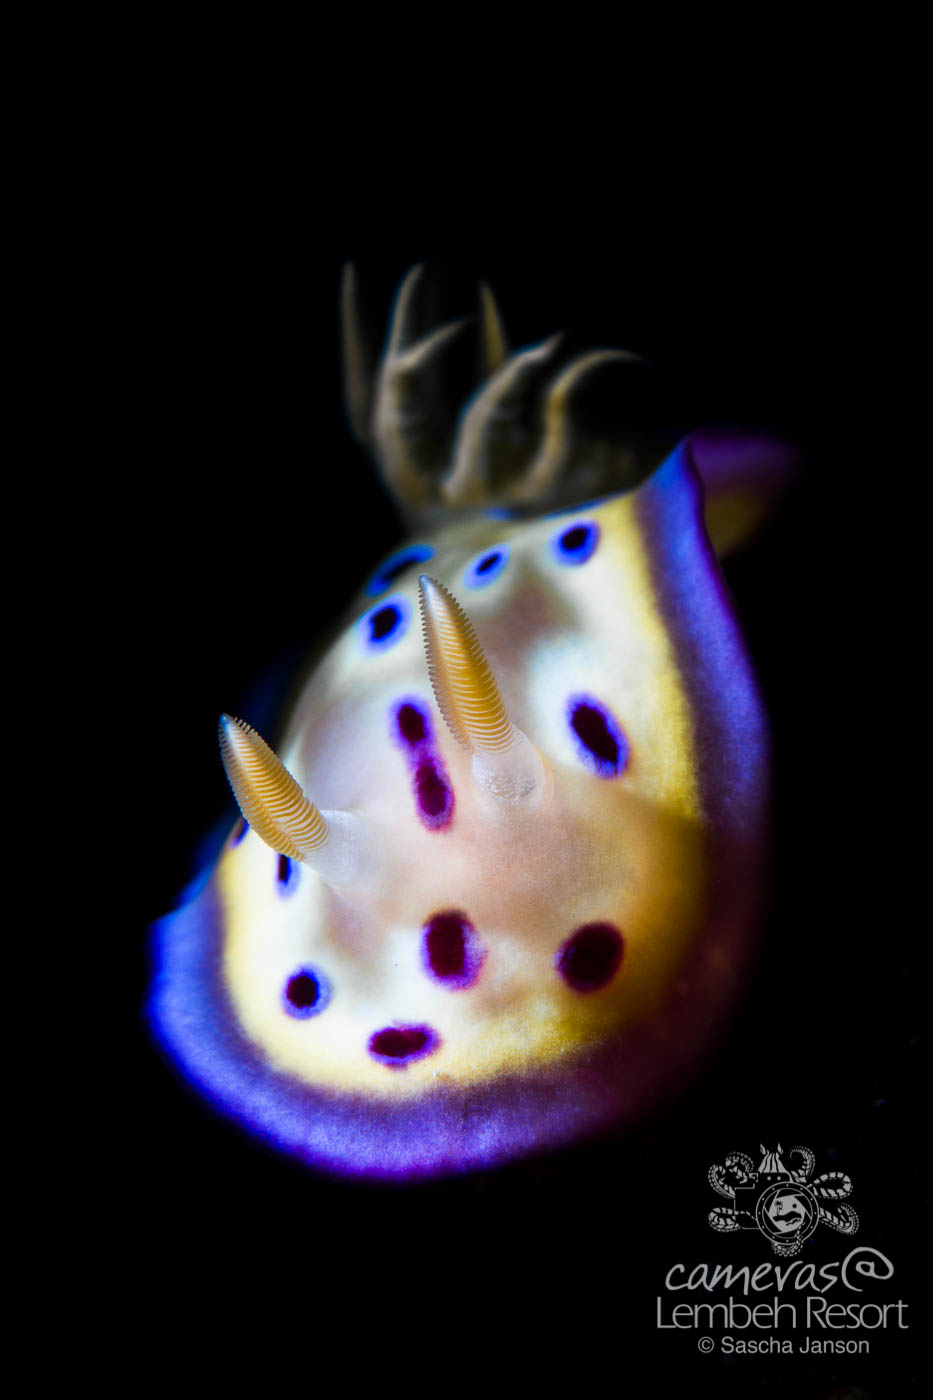
Risbecia tryoni shot with a DIY fiber optic snoot. Canon 7D, 100mm macro, f13, 1/250sec, ISO160, 1x INON Z240 with DIY fiber optic snoot.
Last minute update:
I just saw a new kind of snoot, it has a laser attached, so you can see where the snoot is aiming.
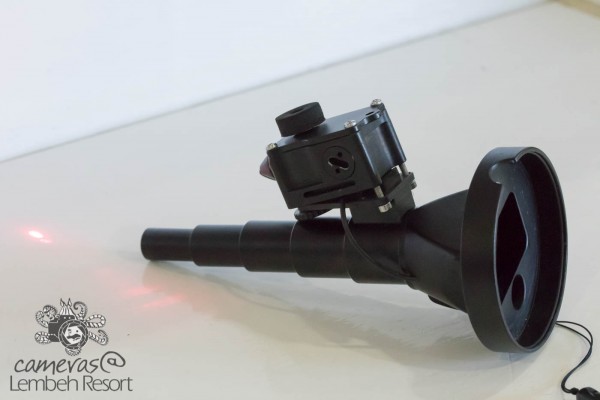
This snoot (for the YS-D1) has an adjustable laser pointer attached – it makes it easier to use. But even here it helps to have a buddy holding the snoot for you, and the laser also helps you find the tiny critters in the viewfinder…just follow the red light!
Our dive guides here at critters @ Lembeh Resort have experience with snoots, and if you choose to hire one as a private guide, they can assist you with positioning it. That is the best solution and then you can also shoot critters that are moving around.
Stay tuned for more Tuesday Tips & Techniques


